Introduction: Why a Budget Sleeping Bag Under 100 Is a Real Backpacking Option
A sleeping bag under 100 dollars is not automatically a compromise you will regret. For backpackers on a tight gear budget, for people taking a first overnight or two, or for anyone who needs a warm-weather bag that does not need to survive a decade of abuse, this price tier is a legitimate place to shop. The appeal is straightforward: it keeps money available for the items that carry more weight in your overall comfort, like a sleeping pad and a shelter, and it lets you get outside now rather than saving for months.
The limitations are just as real, and knowing them up front saves disappointment. At this price, manufacturers cut cost somewhere, usually in a combination of total weight, packed size, insulation quality, shell fabric, and hardware. Heavier synthetic fills and lower-quality down are common, and both tend to mean a bulkier bag in your pack. Stitching, zippers, and draft tubes are often simpler than on premium models, and temperature ratings across this tier should be treated as a rough starting point rather than a guarantee. A bag described as suitable for a given season may feel very different depending on whether you sleep warm or cold, what you wear to bed, and what pad you pair it with.
From here, the article walks through the decisions that actually separate a good budget pick from a bad one: whether to choose a quilt or a traditional bag, how down and synthetic insulation compare on weight, price, and wet-weather performance, how to read a temperature rating without trusting a single number, and which construction details are worth paying attention to when every dollar counts.
Budget Quilt vs Sleeping Bag for Backpacking: What Changes Under 100?
A backpacking quilt and a traditional sleeping bag solve the same problem in different ways. A bag wraps insulation around your entire body, including the back and often a hood, so there is a continuous layer between you and the air. A quilt does away with the back panel and the hood, relying instead on the sleeping pad beneath you for insulation and on the quilt’s edges tucking around you for coverage. That single design change explains most of the practical differences a backpacker notices on the trail.
The first difference is how each handles drafts. A bag’s enclosed shape means there is no opening for cold air to slide in when you roll over, which makes it forgiving for restless sleepers, side sleepers who shift position often, and anyone camping in exposed or windy spots. A quilt depends on you to keep its edges sealed, and it usually attaches to the pad with straps or clips, sometimes with a small elastic cord or a snap at the neck. If those attachments are set up loosely, or if the quilt is wider or narrower than your pad, cold air can creep along the sides. Quilts also leave your head uncovered, so you need a warm hat or a separate hooded layer unless the weather is mild. In exchange, many people find a quilt easier to vent on warm nights simply by throwing an edge aside, without unzipping anything.
Weight, packed size, and versatility follow from that same missing material. Because a quilt carries no insulation on the bottom, it can use less fill and less fabric for a comparable comfort level, which generally translates to a lighter, smaller package — an advantage when every liter of pack space matters. The trade-off is that a quilt is less self-contained: it assumes your pad has enough insulation value for the ground temperature, and it asks you to manage the straps and edges each night. A traditional bag is more of a closed system, which suits colder conditions, first-time backpackers, and anyone who would rather not think about adjustments in the dark. Under $100, both options exist, though quilts at this price tend to be simpler, with fewer strap options or less refined edge tensioning than pricier models. The honest way to choose is to match the design to your sleeping style and the conditions you actually camp in, rather than to whichever type sounds lighter on paper.
Down vs Synthetic Insulation on a Budget: Trade-Offs Backpackers Should Know
For a backpacker working with a tight budget, the down-versus-synthetic question rarely has a clean answer. The two materials differ in ways you notice most once you are actually carrying the bag on your back and sleeping in it, and the least expensive option in each category usually makes some compromise somewhere to hit its price.
Down’s core advantage is warmth for a given weight and packed size. Down clusters trap air very efficiently, so a down bag can generally be lighter and compress smaller than a synthetic bag offering similar warmth. That advantage tends to shrink as you move toward the bottom of the price range. Budget down bags often use lower-quality down, thinner shell fabrics, or simpler construction, so the theoretical weight and bulk benefit does not always show up in the finished product the way it would on a premium bag. Synthetic insulation, by contrast, is typically the more affordable route to a given amount of warmth, which is why it dominates budget shelves.
The larger divide is moisture. Down loses much of its insulating loft when it absorbs water and dries slowly, which is a real concern on damp, multi-day trips or in consistently humid regions. Synthetic fills handle moisture far better: they retain a useful portion of their insulating value when damp and generally dry faster. If your trips involve rain, condensation-prone shelters, or extended stretches without a chance to dry gear, synthetic is usually the safer bet.
Durability and cost work in opposite directions. Down tends to hold its loft over many seasons if it is cared for, so a down bag can last longer and cost less per year of use despite a higher up-front price. Synthetic insulation degrades more quickly with repeated compression and washing, losing loft over time, but replacing a cheap synthetic bag stings less than replacing an expensive down one. Down is also an animal-derived material, while synthetics are not, which matters to some shoppers. Neither material is universally better; the right pick depends on your climate, how many nights you expect to sleep out, and whether you value low weight or forgiveness in wet weather more.
Sleeping Bag Temperature Ratings Explained for Budget Buyers
Temperature ratings are the number most shoppers anchor on, and also the easiest thing on a sleeping bag label to misread. The standard test method used across much of the industry — the European EN 13537 standard and its international successor, ISO 23537 — produces three separate figures rather than one, and they mean different things:
- Comfort rating. The lowest temperature at which a “standard woman” test model can sleep without waking repeatedly from cold. This is the figure that lines up best with what an average sleeper experiences.
- Lower limit. The lowest temperature at which a “standard man” test model stays in thermal balance through the night, curled up. Many bags print this number as their headline rating, which makes them look warmer than they feel.
- Extreme rating. A survival figure only. It describes the point at which the test model is at serious risk, not a temperature anyone should plan to sleep at.
The testing itself is done in a climate chamber with a heated manikin dressed in a defined base layer and lying on a defined sleeping pad, in still air. The manikin’s sensors measure heat loss, and the results are converted into those three ratings for two standardized body types. The value of this is comparison: a certified bag from one brand can be meaningfully checked against a certified bag from another. The limitation is that the test cannot know your metabolism, how tired or well fed you are, how much wind hits the tent, or how much warmth the pad beneath you provides.
That last point matters a lot for budget buyers, because a sleeping bag only insulates your top and sides. The insulation under you is compressed by your body weight and stops working, so your pad — not the bag — determines how much heat you lose downward. A bag that feels cold at its stated rating is very often a bag paired with a thin or uninsulated pad.
Budget bags also tend to differ in how they present ratings. Independent certification is an added cost, so some inexpensive models carry numbers derived from in-house testing, from the manufacturer’s own temperature estimates, or from the fill weight rather than a certified manikin result. Some list only a lower limit or an extreme figure, which flatters the bag. A few print no temperature rating at all beyond a vague seasonal description.
Practically, treat any rating as a comparison tool rather than a promise. If you know you sleep cold, look for a comfort rating a comfortable margin below the lowest temperature you expect, not a limit rating that matches it. Adding a warmer pad, a liner, or a dry base layer usually does more for your warmth per dollar than stepping up to a heavier bag.
Construction and Features That Matter More Than Price
When you compare budget bags, the fabric story is where the first real differences show up. Shell fabrics are usually measured by denier, and a lower denier number generally means a thinner, lighter, more packable fabric that is also easier to snag or abrade. A higher denier adds durability and weight. Ripstop weaves slow down tears, and a durable water repellent finish helps the shell shed condensation and light splashes, though it is not a substitute for a waterproof layer. Liner fabric matters for how the bag feels against skin: plain taffeta slides easily and dries quickly, while brushed or micro-fleece liners feel warmer on a cold night but can hold more moisture. Neither choice is automatically better - decide whether you care more about weight and packability or about hand feel and durability.
How the insulation is held in place is just as important as the insulation itself. Sewn-through construction stitches the shell directly to the liner, which is quick and inexpensive to build but leaves lines where insulation is pinched to almost nothing, creating potential cold spots along the seams. Baffled construction uses internal walls to let insulation loft fully, which is warmer for the weight but costs more and is rarer at the low end. Also look for a draft collar around the shoulders and a draft tube behind the zipper, since these block the airflow that leaks through the closures. A hood with an adjustable drawcord, a zipper that does not snag, and a two-way zipper for venting are all details that affect comfort far more than a printed temperature rating.
Finally, check how the bag connects to your sleeping pad. Attachment loops or straps keep the bag from sliding off during the night, and on a quilt or a bag with a thin back panel they are close to essential. Packed size deserves the same scrutiny: a bag that is warm but fills most of your pack may cost you more in other gear compromises than it saved at checkout. Weigh fabric durability, insulation containment, draft management, and packed volume together, and the cheapest option is rarely the one that performs best over a season of use.
How to Choose the Best Budget Sleeping Bag for Backpacking Under 100
Choosing among budget sleeping bags is less about finding one universally best model and more about matching a bag to the trips you actually take. Start with the coldest overnight low you realistically expect to meet, not the average temperature of the season you camp in. A bag that feels cozy on a mild weekend can leave you shivering on a trip that dips only slightly lower, and inexpensive bags generally offer less margin for error than premium ones, so building in a little extra warmth is usually the safer call.
Temperature ratings deserve a cautious reading. Ratings are not directly comparable from one brand to another, because some manufacturers test their bags to a recognized standard while others rely on in-house estimates, and sleepers themselves vary widely in how warm they run. Use the rating as a rough starting point, then adjust for whether you sleep warm or cold, what you wear to bed, and how much insulation sits between you and the ground. A sleeping pad with meaningful insulation underneath you does as much for your comfort as the bag itself.
Fit and shape matter as much as the rating. Check the bag’s length and its shoulder, hip, and foot girth against your own measurements; a bag that is too tight compresses the insulation and creates cold spots, while one that is far too roomy leaves more dead air for your body to heat. Side sleepers and stomach sleepers often do better in a wider cut or a quilt, while back sleepers can usually stay comfortable in a trimmer mummy shape. If you are considering a quilt, remember that it depends on a secure connection to your pad, so attachment points are not a detail to overlook.
As you compare options, prioritize the features that actually keep warmth in and let you sleep:
- A hood that cinches down and a draft collar or draft tube that seals the gap around your neck and along the zipper.
- A zipper that runs smoothly, has a backing to keep fabric from catching, and can be vented on warmer nights.
- Pad attachment points, if you are buying a quilt, and a cut that stays put when you roll over.
- A shell fabric that resists light moisture and feels durable enough for the way you camp.
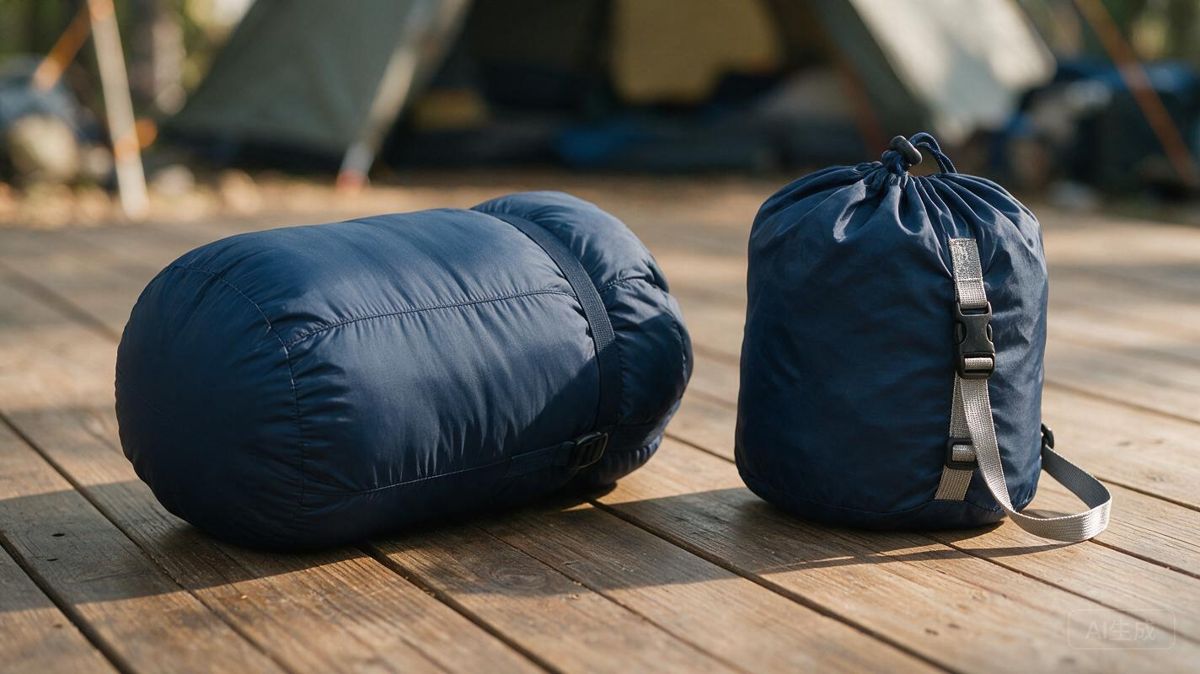
- Both a stuff sack for the trail and a larger storage sack for home, so the bag is not stored compressed.
- A length and width option that genuinely fits you rather than one that is merely close.
At this price point, expect to accept certain compromises. Bags and quilts in this range tend to be heavier and bulkier for the warmth they provide, often because the insulation packs less efficiently or the shell fabric is thicker. Hoods and collars may be simpler, zippers less refined, and sizing limited to one or two options. Ratings can also be optimistic, so it helps to read a range of owner impressions and look for bags that reviewers describe as warm enough in conditions similar to yours. If you can, lie in a bag before buying or confirm the return policy first.
Finally, plan your layering. Sleeping in dry base layers, adding a lightweight liner, or wearing an insulated jacket inside the bag can extend its range considerably and often costs less than moving up to a warmer model. Keep the bag dry, air it out after each trip, and avoid storing it compressed. Choosing for the coldest night you genuinely expect, rather than the warmest, is the simplest way to stay comfortable without spending more.
Conclusion: Matching a Budget Bag to Your Backpacking Reality
The right budget bag is the one that matches how you actually camp, not the one that wins on a spec sheet. If you sleep cold and camp in shoulder-season conditions, a bag with a hood, a draft collar, and a durable shell will serve you better than a lighter quilt that leaves you fiddling with straps in the dark. If you run warm, sleep on your side, and mostly camp in mild summer weather, a quilt paired with a well-insulated pad can save weight and pack space while staying comfortably within a modest budget. Neither choice is universally better — they simply fail in different ways.
Insulation type drives most of the remaining trade-offs. Down offers more warmth per unit of weight and packs smaller, but it costs more and loses loft when it gets wet. Synthetic insulation is generally cheaper, keeps more of its warmth in damp conditions, and is more forgiving of rough handling, at the cost of bulk and a shorter useful lifespan. Under a tight budget, that usually means choosing between a lower fill-power down bag that may be heavier than premium options, or a synthetic bag that is bulkier but more predictable in wet weather.
Temperature ratings deserve a skeptical read regardless of what you buy. Ratings vary between manufacturers and rarely describe the temperature at which an average sleeper stays comfortable, so treat them as a starting point and adjust for how you personally sleep. Your pad, your base layers, and whether you wear a hat and socks all change the real-world result. The practical takeaway is to buy for the conditions you expect most often, leave room in your budget for a decent pad, and layer or supplement when a trip runs colder than planned — a slightly heavier or bulkier setup you can trust beats an optimistic rating you have to fight all night.