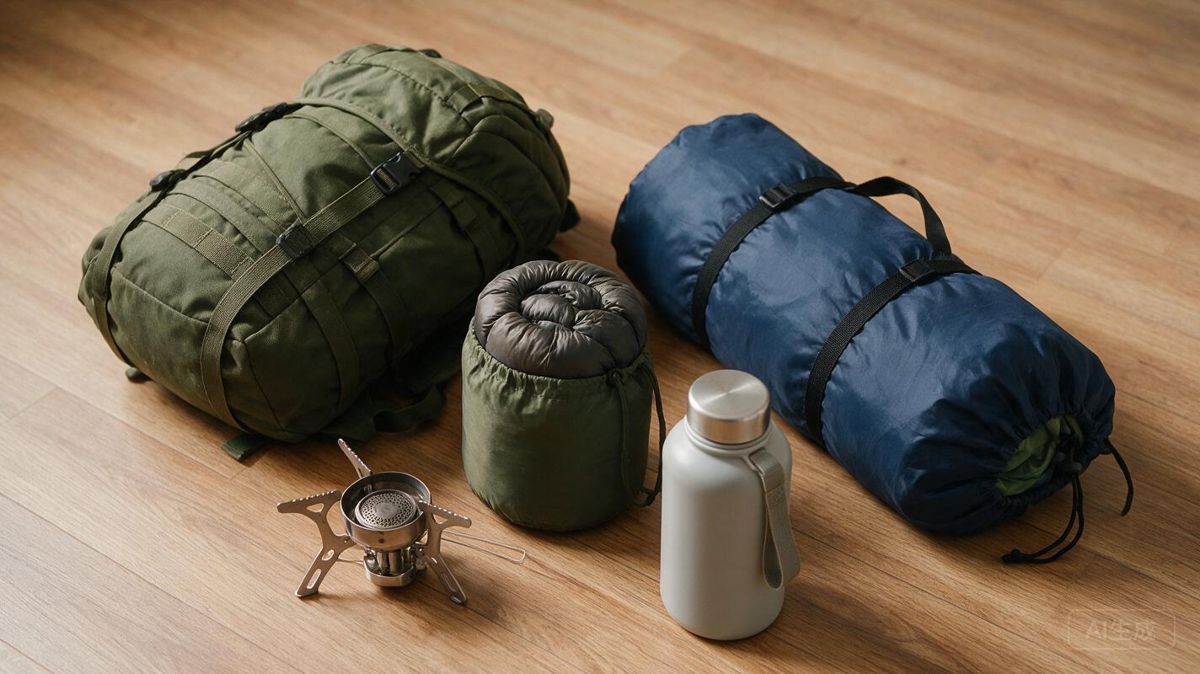
Introduction: Cheap Backpacking Gear for Beginners Is a Strategy, Not a Compromise
A first backpacking kit does not have to come from the most recognizable brands on the shelf. That assumption — that serious trips require serious spending — is usually what stops people before they ever get on a trail. But cost and capability are not the same thing, and a tent, pack, or sleeping bag at a modest price point can carry you through a weekend trip just fine if it fits you, fits your trip, and keeps you dry and warm enough for the conditions you actually expect. Premium gear earns its price through refinements: lighter fabrics, more durable materials, longer warranties, and features that matter more once you already know what you like. Beginners rarely know that yet, which is exactly why paying top dollar on the first purchase is a poor use of money.
Think of cheap backpacking gear for beginners as a strategy rather than a compromise. The strategy is to shop deliberately and to resist buying everything at once. Many people assemble a complete kit before their first overnight, then discover on the trail that the pack rides wrong, the pad is uncomfortable, or the layers they chose do not match the weather they met. Buying in stages lets each trip teach you something before the next purchase.
This guide is written reader to reader, not as a shopping list to follow blindly. The sections ahead walk through a budget backpacking gear list category by category — shelter, sleep system, the pack itself, clothing and layers, cooking and water, and the small essentials that are easy to forget — with notes on where to save and where spending a little more tends to pay off. After that, we cover where to find gear for beginners on a budget: used marketplaces, rental and loaner programs, end-of-season clearance, and borrowing from people who already hike. Treat the specifics as a framework. Availability and pricing shift over time, so it is worth checking current options yourself rather than assuming any single recommendation still holds.
Start With the “Big Three”: Pack, Shelter, and Sleep System
The pack, shelter, and sleep system - often called the “big three” - are where a beginner’s budget does the most work. These three items together determine whether a trip is comfortable, and they are the hardest categories to replace with a borrowed or improvised alternative. Cheap versions of small accessories rarely ruin a trip, but a pack that does not carry weight well, a shelter that leaks, or a sleep system that leaves you cold can end one. That is why it makes sense to spend the largest share of a starting budget here and economize elsewhere.
Fit matters more than branding on a pack. Torso length, not overall height, decides whether a pack sits correctly, and the hip belt - not the shoulder straps - should carry most of the load. Entry-level packs from established brands, including adjustable designs that fit a range of torsos, are a reasonable starting point for beginners who are still learning what volume and features they need. Weight matters too: a lighter pack is easier to carry, but a heavier, well-fitted pack beats a light one that rides badly.
For shelter, simple tarps pitched with trekking poles or tied to trees are the least expensive option and teach useful pitching skills, though they offer less protection in wind-driven rain and insects. Budget tents trade some weight and durability for convenience and enclosed protection. Look for a full-coverage rainfly and a floor with raised edges rather than shopping by brand name.
Sleep systems follow the same logic: warmth, not labels, keeps you rested. Closed-cell foam pads are inexpensive, durable, and bulky; entry-level inflatable pads pack smaller but need careful handling. Synthetic-fill bags cost less than down alternatives, insulate even when damp, and are bulkier to pack. Treat a bag’s advertised temperature rating as a starting point rather than a guarantee, and plan a margin of warmth for cold sleepers.
Clothing and Layering for Backpacking Gear for Beginners on a Budget
Layering for backpacking is simpler than the gear catalogs suggest, and it does not require specialty clothing. The basic system has three parts: a base layer that moves sweat away from your skin, an insulating mid layer that traps warmth, and a rain shell that blocks wind and precipitation. For a beginner on a budget, everyday athletic wear can fill the base layer role, a fleece jacket or lightweight puffy can serve as the mid layer, and a packable rain jacket you already own for commuting or travel can work as the shell. The goal is to adjust these layers as you hike so you stay warm without overheating.
Cotton is a poor choice for wet or cool conditions. It absorbs sweat and rain, dries slowly, and when it is wet it stops insulating and pulls heat away from your body. In cool, windy, or rainy weather, that can leave you chilled even while you are moving. For that reason, avoid cotton t-shirts, jeans, and cotton socks as your main hiking layers. Instead, look for synthetic fabrics or wool, which manage moisture better and retain some warmth when damp.
Before spending anything, go through what you already own. Running shirts, athletic leggings, fleece pullovers, and thin puffy jackets from your everyday wardrobe can often work for beginner trips. A waterproof shell you use for city rain is usually fine for light trail rain. When you do need to fill gaps, thrift stores, clearance racks, and discount retailers frequently carry suitable synthetic or wool pieces at low cost. Focus on fit, comfort, and whether the item keeps you dry and warm, rather than on brand names or mountaineering-specific features. You can upgrade individual pieces later as you learn what works for the conditions you actually hike in.
The Small Stuff: Kitchen, Water, and Navigation on a Tight Budget
Once the big three and your clothing layers are settled, the remaining items are where beginners most often overspend on gadgets. The kitchen is the clearest example. A single small pot, a long-handled spoon, a lighter, and one simple stove will cover most beginner trips. Canister stoves are convenient and easy to light, while alcohol stoves are cheaper to run but slower and fussier in wind and cold. If you would rather not buy a stove at all, cold-soaking meals in a jar costs nothing and needs no fuel. Skip the multi-piece cook sets, the insulated mug, and the folding utensil kit; they add weight and cost without adding capability. A piece of foil or a folded windscreen does more for a stove’s performance than a second pot does.
Water treatment comes down to tradeoffs rather than a single best answer. Squeeze and pump filters remove debris and many pathogens but can clog, need backflushing, and can be damaged by freezing. Chemical tablets and drops are inexpensive and weigh almost nothing, though they take time to work and are less effective against some organisms than filtration. Boiling works but burns fuel, and UV pens depend on batteries. Match the method to the water sources you actually expect to encounter, and check local land-manager guidance for the area, since recommendations differ by region. For many beginners, one filter plus a small bottle of backup chemicals is enough.
Navigation and light are two more places to resist upgrades. A paper map and a baseplate compass cost little, work without batteries, and teach you skills a phone app quietly replaces. Phone apps are genuinely useful for planning and for confirming your position, but they depend on a charged battery, a working screen, and maps you downloaded before leaving signal. Carry both. A basic LED headlamp is fine; spare batteries matter more than lumens. For first aid, assemble your own small kit from a pharmacy rather than buying a bulky prepackaged one: blister care, adhesive bandages, tape, a pain reliever, and any personal medication you already take as directed by your clinician.
Finally, budget for consumables. Fuel, food, treatment chemicals, batteries, and tape are recurring costs that quietly outpace one-time gear purchases over a season. Repackaging items into smaller containers and buying basics in larger sizes keeps that running cost down.
Where to Find Cheap Gear: Used, Rented, Borrowed, and Off-Season
Buying used is often the fastest way to assemble a full kit on a small budget, and the categories that survive resale best are the ones with the fewest parts that wear out: a framed pack, a simple shelter, trekking poles, a cook pot, a headlamp. When you inspect a used item, look at what fails first - zippers, seam tape, buckles, and the foam inside a sleeping pad. A pack stored damp can carry mildew, and a tent whose waterproof coating has gone tacky will not shed rain well regardless of how good the original design was. Ask why the seller is letting it go, and avoid anything that needs repair skills you have not built yet. Footwear is the one category worth buying new when possible, since a used pair has already molded to someone else’s foot.
Renting or borrowing solves the opposite problem: the item you need once. Outfitters, university outdoor programs, and local clubs commonly rent tents, packs, and canisters, and a first overnight trip is a sensible moment to test a borrowed shelter before committing money to a design you may dislike. Among friends and family, ask specifically for the expensive, low-frequency items rather than trying to borrow an entire kit at once. Gear swaps, consignment shops, and club classifieds sit between the two approaches - cheaper than retail, but with less accountability than a rental counter, so check return policies and inspection windows before you hand over money.
Timing matters as much as channel. Retailers clear previous-season models and end-of-season stock, so shopping in the shoulder months around a product’s off-season can stretch a budget further than waiting for a holiday sale. Line up purchases with the rule you already know: buy the items that determine warmth and safety first, and delay optimization - the lighter stove, the spare set of camp shoes, the upgraded anything that already works. A borrowed shelter and a clearance sleeping bag will get you out the door; the refinements can wait until you know what you actually want.
A Beginner’s Budget Backpacking Gear List: What You Can Safely Skip at First
Once the big three are settled and you’ve sourced what you can secondhand, build the rest of your kit around a single limit: what you need to spend one night out safely, and nothing beyond that. A workable starter list, by category:
- Kitchen: a small canister stove or a no-cook meal plan, one pot or mug, a lighter, and a stuff sack for food. Going no-cook removes the stove, fuel, and cookware entirely.
- Water: a way to carry it (bottles or a bladder) and a way to treat it (filter, drops, or tablets). Match the treatment method to the water sources you actually expect to find.
- Navigation: a paper map and compass, with a phone app as backup rather than the other way around.
- Light: one headlamp, plus spare batteries.
- First aid and repair: a small kit of basics, a bit of tape, and a patch for your sleeping pad.
- Hygiene: trowel, toilet paper in a sealed bag, hand sanitizer, and a small amount of sunscreen and insect repellent suited to the season.
- Worn and carried essentials: rain jacket, insulating layer, spare socks, and one small emergency item such as a whistle.
The part most beginners get wrong is buying everything on the first list they find. Camp shoes are the clearest example: a second pair for creek crossings and evenings around camp is popular, but for a first season of short trips, loosening your hiking shoes at camp usually does the job. A camp pillow can be a stuff sack filled with spare clothing. Multiple knives, multitools, and gadget-heavy accessories are redundant when one small knife covers nearly every trail task. Specialized clothing — dedicated hiking shirts, zip-off pants, purpose-built socks beyond a couple of pairs — accumulates quickly, yet ordinary athletic layers that aren’t cotton handle most conditions. Save specialty items for problems you have actually run into.
The way to learn which categories are genuinely optional for you is to test gear on short, low-risk trips before spending more: an overnight at a nearby site, or a two-night trip you can walk out of easily. Afterward, note what you never touched and what you wished you’d had. Gear that goes unused across two or three outings is a candidate to leave home; gear you miss repeatedly is worth buying properly. Tying purchases to that pattern keeps your spending attached to real needs instead of to a list someone else wrote.
Conclusion: Build Your Kit Slowly and Hike Sooner
The pattern that makes cheap beginner backpacking gear work is sequencing, not shopping. Put your first real money into the big three — pack, shelter, and sleep system — because those items carry the most weight, affect warmth and comfort the most, and are the hardest to substitute with things you already own. Everything else can wait. Borrow a tent or a pad before you commit to buying one, and when you do buy, used gear from reputable sellers usually stretches a small budget further than new gear does. Then let your trips tell you what to upgrade. An item you use on almost every outing earns its replacement; an item that stays in the bottom of your pack does not.
The second half of the strategy is simply going sooner. You do not need a complete kit to take a first trip. Pick a short, low-commitment overnight — a familiar trail, a modest distance, a night when the weather looks reasonable — and pack with what you already have plus whatever you borrowed. A single night will teach you more about your gear than hours of reading. You will find out whether your sleeping setup is warm enough, whether your pack carries comfortably, and which small annoyances matter enough to fix before the next trip.
Treat each outing as a test rather than a final exam. Come home, note what worked and what did not, change one or two things, and go again. Check local rules before you head out, since overnight camping is not permitted everywhere and some areas require permits or have seasonal restrictions. Over a season or two, that loop of short trips and small upgrades will build a kit that fits you far better than one big purchase made before you knew what you were doing. Start with the big three, borrow what you can, upgrade only what you use, and plan that first night out now rather than waiting for a perfect setup that will never quite arrive.